Showing posts with label ombre. Show all posts
Wednesday, June 18, 2014
Bejeweled Ombre
Hello, Fireflies!
For my third Black and White NCC challenge this month, I wanted to do an ombre. Or is it a gradient? This terminology has caused great consternation, gnashing of teeth, and spilling of acetone in the nail polish world.
I try not to get my panties in a twist about the drama. I accept the majority explanation of different colors on the same nail as a gradient, and a transition of colors in the same color family as an ombre. Hombre is Spanish for 'man.' Totally not applicable.
So now, maybe you learned something today. Gold star!
From thumb to pinky, I created this ombre nail art with Revlon Spirit, OPI My Boyfriend Scales Walls, Essie No Place Like Chrome, Nailtini Caviar Cocktail, and Wet 'n Wild Black Creme.
And then, I stuck some pretty silver and grey nail jewelry on it! You know they didn't stay long, but I love how they looked for a minute.
Do you like gradient/ombre manicures? Do you have an opinion as to the terminology of same?
Labels:
black,
Essie,
grey,
Nail Challenge Collaborative,
Nailtini,
ombre,
OPI,
Revlon,
rhinestone,
silver,
Wet and Wild,
white
Saturday, September 7, 2013
Zoya Blue Ombre
MOAR Zoya today, Fireflies!
When Zoya has a BOGO, I am always there. They had a back-to-school promo I took advantage of - Earth Day is always a good day to stock up, too.
I started with Zoya Raven. It's the closest thing to pure black that Zoya has at the moment. You can't really tell from my pix, but it actually has tiny flecks of silver. It's a nice black, but it took me 2-3 coats, so it won't replace Cult Nails Nevermore for a one-coat black.
Well, I like black nails almost as much as the next gal, but I rarely wear just plain black nails. So, I was inspired to do this ombre technique from Fundamentally Flawless.
I added a layer of Zoya Neve, covering all but the very edges of my nail. I thought I had enough metallic blues, but I needed Neve. It has a really neat pink and blue shimmer!
Leaving a little bit of Neve exposed, I covered the center of the nails with Zoya Sailor. This was dustier than I thought it would be, but is a nice counterpoint to the shimmer of Neve.
How did I not know about Zoya Crystal before? This is gorgeous - I love the mix of blue and gold together in this polish.
As the final highlight, a tiny stripe of Zoya Rocky.
So easy, you can do it on your non-dominant hand! I just wish I could take the pix quicker - before I ding a nail. And also, I need to figure out how to do better lighting for that hand. I get all twisty trying to get a good pix.
Zoya pretties!! Raven, Neve, Sailor, Crystal, and Rocky.
What do you think of this ombre striped technique? I love that there are so many ways to do it. A great way to show off my Zoyas, too!
When Zoya has a BOGO, I am always there. They had a back-to-school promo I took advantage of - Earth Day is always a good day to stock up, too.
I started with Zoya Raven. It's the closest thing to pure black that Zoya has at the moment. You can't really tell from my pix, but it actually has tiny flecks of silver. It's a nice black, but it took me 2-3 coats, so it won't replace Cult Nails Nevermore for a one-coat black.
Well, I like black nails almost as much as the next gal, but I rarely wear just plain black nails. So, I was inspired to do this ombre technique from Fundamentally Flawless.
I added a layer of Zoya Neve, covering all but the very edges of my nail. I thought I had enough metallic blues, but I needed Neve. It has a really neat pink and blue shimmer!
Leaving a little bit of Neve exposed, I covered the center of the nails with Zoya Sailor. This was dustier than I thought it would be, but is a nice counterpoint to the shimmer of Neve.
How did I not know about Zoya Crystal before? This is gorgeous - I love the mix of blue and gold together in this polish.
As the final highlight, a tiny stripe of Zoya Rocky.
So easy, you can do it on your non-dominant hand! I just wish I could take the pix quicker - before I ding a nail. And also, I need to figure out how to do better lighting for that hand. I get all twisty trying to get a good pix.
Zoya pretties!! Raven, Neve, Sailor, Crystal, and Rocky.
What do you think of this ombre striped technique? I love that there are so many ways to do it. A great way to show off my Zoyas, too!
Sunday, March 31, 2013
Sunday Stamping - Happy Easter
The theme for this week was Easter.
Yesterday, I did a mani with different pastels. Today, I wanted to focus on one color. So I did a kinda-sorta ombre with purple.
From thumb to pinky (and left to right in the bottle shots) Sally Hansen Smooth and Perfect Whisper, Rimmel London I Lilac You, Barry M Gelly Prickly Pear, Essence Oh My Glitter! and (front bottle) Sally Hansen Insta-Dry Orchid Express.
While looking through my stamps, I found one that just said Easter to me - the lily. This stamp is from Bundle Monster 314, and I stamped with Finger Paints Paper Mache.
Per usual, these stamps look better on larger nails. Or, at least it would be easier to tell what the picture is supposed to be!
Are you celebrating today? Did you do a festive mani?
Friday, April 20, 2012
orange ombre - butterfly kisses
I wanted to do a sunny, summery nail, so I picked Zoya Arizona for my manicure today. I am just starting to use Zoya polishes - they are a little thinner than what I've been used to, but they do have a nice formula. I wasn't in love with Arizona, but I do set myself up for failure with these oranges. I love the color, but it doesn't always love me back. To temper the color, I decided to do an ombre nail with OPI Take the stage.
The interwebs say that this ombre nail is very ON TREND. I hear that a lot. On Trend. I've never been on trend before. With, uh, anything. I'm not sure how I feel about it.
The ombre nail is simply another color sponged onto the nail using a makeup sponge.
Put a little polish on the sponge, and dab it gently (you can always add more polish, it's harder to take it away) about 1/2 to 3/4 up the nail. I like to dab another layer at the tip to make it opaque at the bottom.
I really liked this look, and it made the Arizona more wearable for me.
A few hours later, though, I started playing around again....
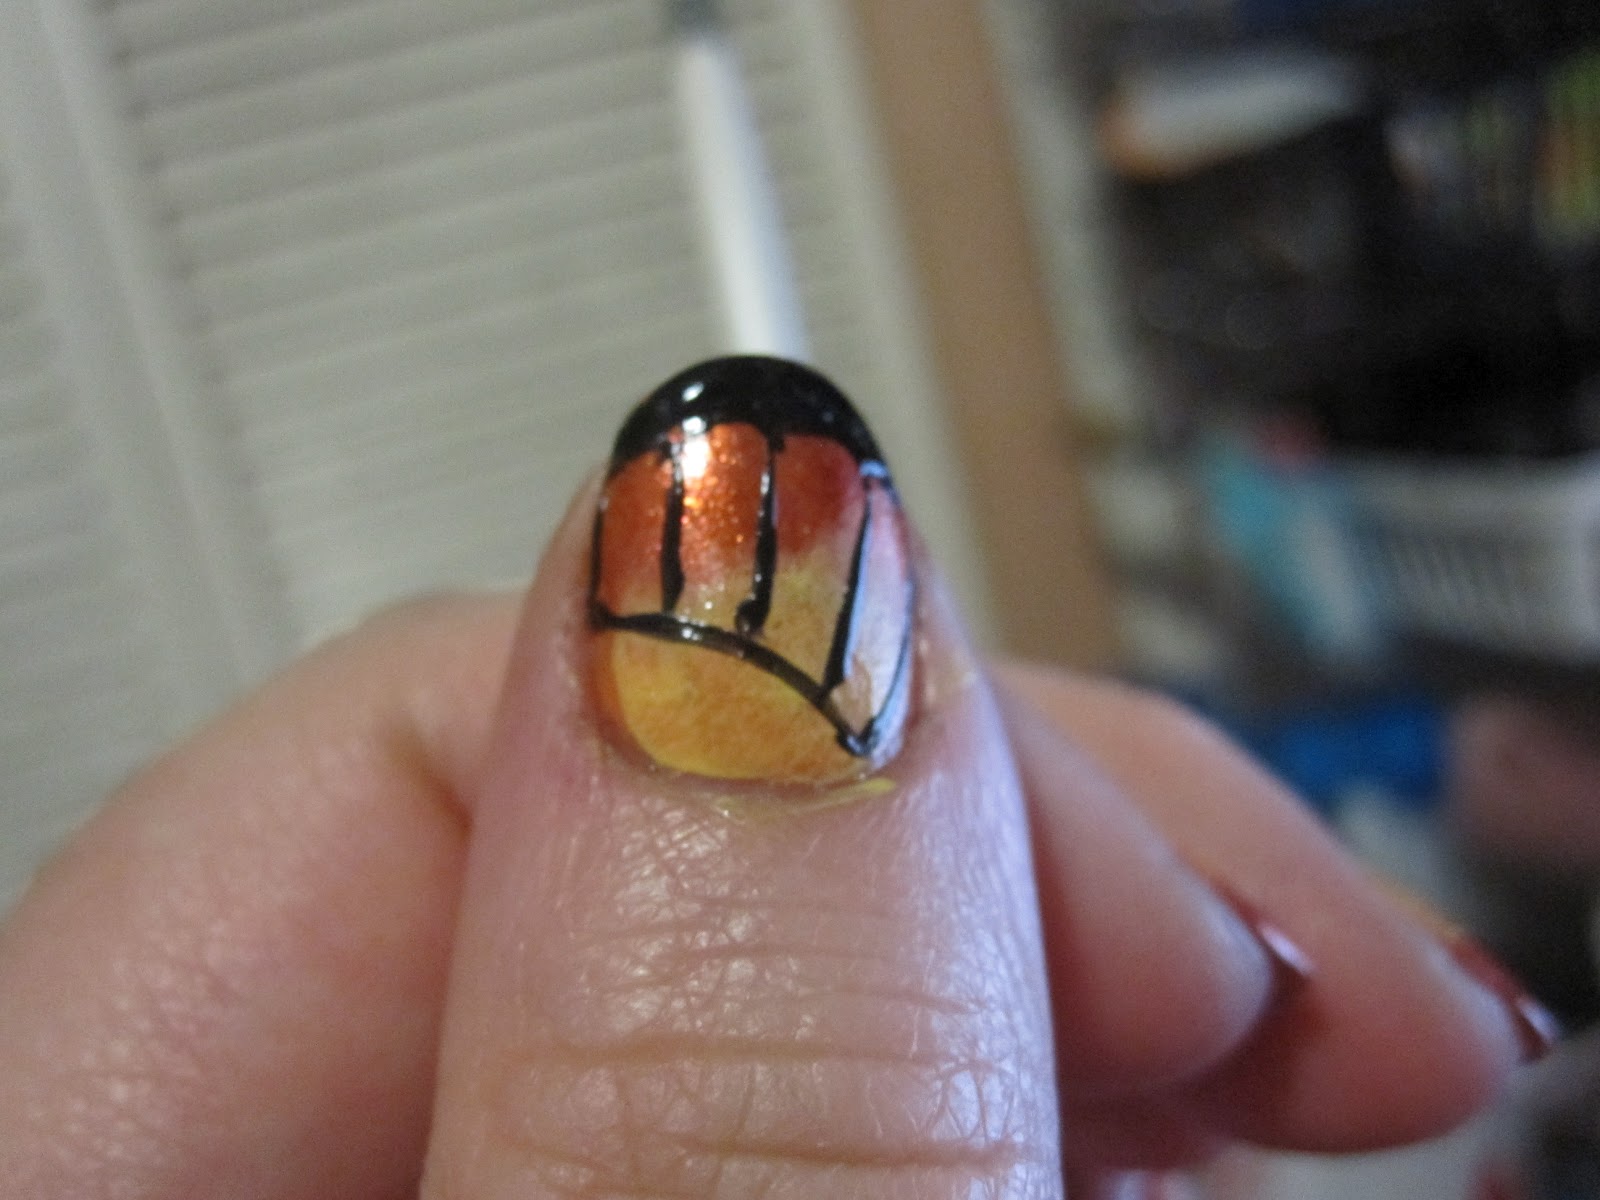
...and used a sponge to add some yellow (Sally Hansen Xtreme in Mellow Yellow) to the nail, so I could try a new-to-me nail art, the monarch butterfly.
After sponging on the yellow and orange, take a nail striper and black polish (I used Pure Ice Black Rage) and make a curved line from the cuticle to the side of the nail bed. Then make diagonal lines out from the curved lines. Cap off each segment with a curved line, and fill in the tip.
Add white hi-light dots along the edge. I also added some near the cuticle, but I didn't like it there as much. You'll want to use a top coat to make the art pop and to protect it.
I was happy that my husband recognized these as butterfly wings when I showed him the mani. I'm proud of my first try! It's a little busy of a look for me, but I'd probably do it again for a theme mani, or as an accent nail.
The interwebs say that this ombre nail is very ON TREND. I hear that a lot. On Trend. I've never been on trend before. With, uh, anything. I'm not sure how I feel about it.
The ombre nail is simply another color sponged onto the nail using a makeup sponge.
Put a little polish on the sponge, and dab it gently (you can always add more polish, it's harder to take it away) about 1/2 to 3/4 up the nail. I like to dab another layer at the tip to make it opaque at the bottom.
A few hours later, though, I started playing around again....
...and used a sponge to add some yellow (Sally Hansen Xtreme in Mellow Yellow) to the nail, so I could try a new-to-me nail art, the monarch butterfly.
After sponging on the yellow and orange, take a nail striper and black polish (I used Pure Ice Black Rage) and make a curved line from the cuticle to the side of the nail bed. Then make diagonal lines out from the curved lines. Cap off each segment with a curved line, and fill in the tip.
Add white hi-light dots along the edge. I also added some near the cuticle, but I didn't like it there as much. You'll want to use a top coat to make the art pop and to protect it.
I was happy that my husband recognized these as butterfly wings when I showed him the mani. I'm proud of my first try! It's a little busy of a look for me, but I'd probably do it again for a theme mani, or as an accent nail.
Subscribe to:
Posts (Atom)