Showing posts with label guest. Show all posts
Thursday, March 3, 2016
Fan Nail Art With Friends
Hello, Fireflies!
A while ago, a friend of mine asked me if I could do her nails with this design she found online. I loved it, too, so I made one for myself, and one for her!
Saturday, June 6, 2015
Manis & Margaritas With Friends
Hello, Fireflies!
My husband and I both teach at a local university, and sometimes we have some very special students come into our lives and stay as friends. Chelsea and Carolyn will sometimes come over for manis, and then we all go out for margaritas, one of my faves.
Friday, February 13, 2015
Love Actions
Hello, Fireflies!
When I was thinking about today's challenge, Love Letters, I kept coming back to the idea of actions being stronger than words. The love 'letters' I'm going to show you are the letters I create with nail polish for some of the people I love.
Thursday, February 5, 2015
From The Vault - Guest Nails
Hello, Fireflies!
I love nail art, and am lucky enough to have some friends who also love nailart, too. Today, I've gone back into the vault and pulled out some looks that I have done on my friends' nails! For someone like me who isn't a nail tech and is used to the shape and angles of my own nails, it can be a fun challenge to adapt to another person's nails.
Thursday, January 22, 2015
Gone in Sixty Seconds - A Guest Post from Nicki Zevola of FutureDerm - and a Giveaway!
This is a guest post from Nicki Zevola of FutureDerm.com, a blog dedicated to the science of beauty.
Typically, I'm a fan of the slow-and-steady approach to getting things done. When I started running again, I started at 4.0 mph (yes, I realize that is pretty much walking), and increased 0.25 mph each run until I got back up to speed, so to speak, at 6.5 mph. When I started dieting, I cut 200 calories per week, rather than going through the whole "yes I'm juice fasting and don't speak to me" thing for a few days.
When it comes to wrinkles, I'm typically an advocate of the slow-and-steady approach as well: Steady use of ingredients like retinol, vitamins C and E, other antioxidants, peptides, amino acids, and sunscreen lead to consistent results over time. But then a product like the Gone in Sixty Seconds Instant Wrinkle Eraser ($19.95, AminoGenesis. com) comes along. With ingredients like sodium silicate and magnesium aluminum silicate, this wrinkle eraser is tops for instantly erasing the look of fine lines and wrinkles and providing the temporary look of a little bit of a "lift." It lasts for one day, and leaves no residue. For more on the ingredients and my personal opinions (and to enter the giveaway), read on!
Friday, April 4, 2014
Guest Post on Glitterfists!
Hello, Fireflies!
I have a guest post on Glitterfists!
Please click HERE to see my post! Find out what this creamy peach polish is, and check out what I did with it and two other Butter London polishes.
I have a huge post with a great GIVEAWAY going live at 9am today, so I hope you'll come back and enter to win a Reviva Labs prize package.
I have a guest post on Glitterfists!
Please click HERE to see my post! Find out what this creamy peach polish is, and check out what I did with it and two other Butter London polishes.
I have a huge post with a great GIVEAWAY going live at 9am today, so I hope you'll come back and enter to win a Reviva Labs prize package.
Wednesday, February 19, 2014
Minion Party!
Hello, Fireflies!
You may remember that a while ago, I had a friend ask me to paint Minions on her nails, so I practiced and did a set for her. (You can see my post on my Minion nail art here.)
Well, her friend had a Minion-themed party, and invited me to come! There was a big Minion cake!
And there were Minion cupcakes! With REAL Twinkies!
My contribution was to paint a few of the girls' nails. The hostess wanted, of course, Minion nails, which I was more than happy to do.
Everyone was duly impressed that I gave some of the Minions teeth. I have to say, that's one of my favorite details!
These turned out so cute! I love them. The colors I used to make the Minions: Zoya Pippa, OPI I Saw..You Saw..We Saw...Warsaw, Milani White On The Spot, Wet 'n Wild Black Creme, Sally Hansen Insta-Dry Presto Pewter, and Julep Anisa.
One girl wanted simpler nails, but couldn't resist the blue and yellow, so she chose an accent nail. I used OPI I Saw..You Saw..We Saw...Warsaw, and Zoya Pippa for this mani.
This young lady was having engagement photos taken the next day, so she wanted something simpler. I was going to do some nail art, but unfortunately, I ran out of time. I love the subtle shimmer on these! I used Finger Paints Silver Sculpture and OPI Next Stop...The Bikini Zone.
My friend, Carolyn, took soooo looong to decide, we had to do a quick mani. This is my idea of a faux gradient, and then I gave her little hearts as accents. I used Milani White On The Spot, China Glaze Elfin' Around and China Glaze Just Be-Claws.
I had such a good time at the party, and it was so much fun to give these girls fun and unique manis. It's very different painting someone else's nails after you've been so used to only painting your own! I made such a mess - thank goodness I remembered to bring my cleanup brush!
Do you like doing other people's nails, or having yours done by someone else?
You may remember that a while ago, I had a friend ask me to paint Minions on her nails, so I practiced and did a set for her. (You can see my post on my Minion nail art here.)
Well, her friend had a Minion-themed party, and invited me to come! There was a big Minion cake!
And there were Minion cupcakes! With REAL Twinkies!
My contribution was to paint a few of the girls' nails. The hostess wanted, of course, Minion nails, which I was more than happy to do.
Everyone was duly impressed that I gave some of the Minions teeth. I have to say, that's one of my favorite details!
These turned out so cute! I love them. The colors I used to make the Minions: Zoya Pippa, OPI I Saw..You Saw..We Saw...Warsaw, Milani White On The Spot, Wet 'n Wild Black Creme, Sally Hansen Insta-Dry Presto Pewter, and Julep Anisa.
One girl wanted simpler nails, but couldn't resist the blue and yellow, so she chose an accent nail. I used OPI I Saw..You Saw..We Saw...Warsaw, and Zoya Pippa for this mani.
This young lady was having engagement photos taken the next day, so she wanted something simpler. I was going to do some nail art, but unfortunately, I ran out of time. I love the subtle shimmer on these! I used Finger Paints Silver Sculpture and OPI Next Stop...The Bikini Zone.
My friend, Carolyn, took soooo looong to decide, we had to do a quick mani. This is my idea of a faux gradient, and then I gave her little hearts as accents. I used Milani White On The Spot, China Glaze Elfin' Around and China Glaze Just Be-Claws.
I had such a good time at the party, and it was so much fun to give these girls fun and unique manis. It's very different painting someone else's nails after you've been so used to only painting your own! I made such a mess - thank goodness I remembered to bring my cleanup brush!
Do you like doing other people's nails, or having yours done by someone else?
Labels:
black,
blue,
China Glaze,
Finger Paints,
freehand,
guest,
hearts,
Milani,
Minions,
OPI,
red,
Sally Hansen,
silver,
Wet and Wild,
white,
yellow,
Zoya
Monday, January 6, 2014
Penguins for Toni - #NailArtForNubs
(Two posts today! I have a post up already sharing my experience with CLEAN Perfume, click here if you'd like to check it out.)
Hello, Fireflies!
I have a special guest's nails for my Nail Art For Nubs post today. My friend, Toni, loves to have nail art for school. She either brings me pix of nail art she likes, or she tells me what she wants, and I go looking for pictures or tutorials on how to do it!
This time, she wanted snow and penguins, so I found this video by HelloKitty12822 that had the *cutest* penguins, and Toni wanted those.
I absolutely adore them! I used Revlon Sequin for the silver nails, and Cult Nails Tempest for the snow. I used Tempest and also Cult Nails Nevermore for the Penguin's body, along with various nail art stripers.
I think these are perfectly suited for nubbins because it gives the penguin a really cute shape! What with the raging snow storm over much of the USA this week, it's still a totally appropriate chilly-willy nail art to do, too! Are you rockin' chilly nail art this season?
Hello, Fireflies!
I have a special guest's nails for my Nail Art For Nubs post today. My friend, Toni, loves to have nail art for school. She either brings me pix of nail art she likes, or she tells me what she wants, and I go looking for pictures or tutorials on how to do it!
This time, she wanted snow and penguins, so I found this video by HelloKitty12822 that had the *cutest* penguins, and Toni wanted those.
I absolutely adore them! I used Revlon Sequin for the silver nails, and Cult Nails Tempest for the snow. I used Tempest and also Cult Nails Nevermore for the Penguin's body, along with various nail art stripers.
I think these are perfectly suited for nubbins because it gives the penguin a really cute shape! What with the raging snow storm over much of the USA this week, it's still a totally appropriate chilly-willy nail art to do, too! Are you rockin' chilly nail art this season?
Tuesday, September 3, 2013
Guest Nails - Anchors and Dragons!
Hello, Fireflies!
You may recognize these guest hands by now! My friend Jill and her daughter Toni are becoming regulars here on the blog! I love having our girly visits and helping Toni get ready for a new week at school.
Jill still isn't smoking anything other than the e-cigarette, and her nails are looking better! She wanted a French mani with Essie Shop Till I Drop as the base, and Ninja Polish Basilisk on the chevron tip.
I love the way it looks, but I put the glitter on a little thick (over a thin layer of OPI Black Onyx) and some of her nails smudged before they could fully dry. Always a lesson to be learned!
Toni asked for a replica of a sailor mani she had seen on Instagram. I couldn't find the owner of the original, sadly. It looked like they had used pieces of red tape over a white base, but I did the tape over a white base (Cult Nails Tempest), then painted the red (Sally Hansen Sacred Scarlet) over the tape. The white stripes appear when you pull the tape off! Like magic!
It was a lot of tape, and some of my lines weren't perfect, so she wanted to see what it looked like if I just painted red stripes. You may notice I only did *one* nail like that, because she preferred it the original way. I did clean up a little using a striping brush, though.
The blue is OPI I Saw..Warsaw, and I used a dotting tool and a striper to draw the anchor.
She loved it, and I got to do a mani I never would have attempted on my own. I can't wait to see what she wants me to try next time!
You may recognize these guest hands by now! My friend Jill and her daughter Toni are becoming regulars here on the blog! I love having our girly visits and helping Toni get ready for a new week at school.
Jill still isn't smoking anything other than the e-cigarette, and her nails are looking better! She wanted a French mani with Essie Shop Till I Drop as the base, and Ninja Polish Basilisk on the chevron tip.
I love the way it looks, but I put the glitter on a little thick (over a thin layer of OPI Black Onyx) and some of her nails smudged before they could fully dry. Always a lesson to be learned!
Toni asked for a replica of a sailor mani she had seen on Instagram. I couldn't find the owner of the original, sadly. It looked like they had used pieces of red tape over a white base, but I did the tape over a white base (Cult Nails Tempest), then painted the red (Sally Hansen Sacred Scarlet) over the tape. The white stripes appear when you pull the tape off! Like magic!
It was a lot of tape, and some of my lines weren't perfect, so she wanted to see what it looked like if I just painted red stripes. You may notice I only did *one* nail like that, because she preferred it the original way. I did clean up a little using a striping brush, though.
The blue is OPI I Saw..Warsaw, and I used a dotting tool and a striper to draw the anchor.
She loved it, and I got to do a mani I never would have attempted on my own. I can't wait to see what she wants me to try next time!
Labels:
black,
blue,
chevron,
Cult Nails,
Essie,
freehand,
glitter,
guest,
Ninja Polish,
OPI,
pink,
red,
Sally Hansen,
tape,
white
Monday, August 19, 2013
Back to School! Pencils and Pandas
Hello, Fireflies!
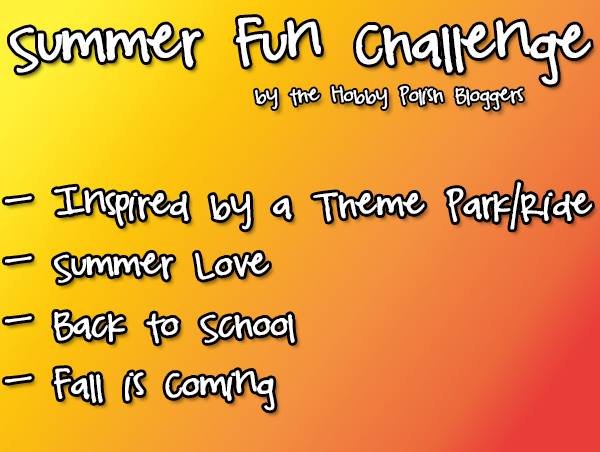
I'm going to pretend that I'm not doing these out of order, and while my Summer Love mani is finished, I wanted to bump this mani up to today because public school in my county starts today! I don't have kids, but the collective cheering of all the moms is deafening.
Labels:
Above the Curve,
black,
Bondi,
Cult Nails,
freehand,
french tip,
glitter,
guest,
holo,
Liquid Sky Lacquer,
panda,
pencil,
pink,
Revlon,
silver,
tape,
white,
yellow,
Zoya
Wednesday, July 24, 2013
Guest Post on Nail Glaze!
I don't know how this fell through the cracks, but I did a guest post over at Nail Glaze, and I would love for y'all to check it out! I did a bright, summery glitter/dotticure mani for her blog that I loved.
While you're there, please check out her blog and Facebook page, if you'd like, and share the love.. or likes..
Wednesday, July 17, 2013
Guest Post on the Bubbly Brunette!
I did a guest post for The Bubbly Brunette! I love this look... black and silver! That's all you'll get outta me, please go visit The Bubbly Brunette HERE to see my post!
And, if you happen to like her other stuff, I hope you'll follow her on Facebook, and give her page a follow. Thanks!
Friday, June 14, 2013
Guest Post - Southern Sparkle Nail Art!
I'm excited to have a guest today on the blog, with a nail art technique I've never done before! And it looks great and easy! Say hi to Samantha....
Hello Lacquer Lovers! Tonight I’ve swapped posts with the wonderful Nidia! My name is Samantha and my blog is Southern Sparkle Nail Art! I’ve created this DIY Tie-Dye look that only requires four polishes! No other tools are required! It’s a super easy look to complete and can be used for a large range of colors! :]
I used four Sinful Colors polishes in Orange Cream, Cotton Candy, Island Coral, and Sugar N Spice.
For my base I used Orange Cream which is a lovely peachy color with a shimmer finish. It was opaque in two coats and had a wonderful dry time!
I next applied Island Coral which is a pink based coral. It also had a shimmer finish. I got most of the polish off of the brush. I then dabbed it in random places throughout the nail where I wanted the base of my design to be. It had a great dry time since it was only one thin layer.
Then with a very minimal amount of Sugar N Spice on the end of the brush, I dabbed around the splotches of Island Coral. Sugar N Spice is a gorgeous darker based pink. It has a shimmer finish and a great dry time (for one coat)!
With a small amount of Cotton Candy pooled up at the end of the brush, I dabbed it in the middle of my designs. Cotton Candy is the perfect pale pink with a shimmer finish. It, as all of the other polishes, had a great dry time for one coat.
I then applied top coat and voila, I was finished! In all this design took me at most 30 minutes.
Overall, this is the perfect summer look! It’s super versatile because it can be done in a range of colors!
Thank you Nidia for having me!
You can find Nidia’s post on my blog, HERE.
I can be found on Facebook, HERE, and on Instagram, HERE. I’d love to hear from you and see your recreations of my manicure! Talk to you soon!
Labels:
freehand,
guest,
peach,
pink,
Sinful Colors,
Southern Sparkle,
tie-dye
Thursday, May 30, 2013
Is it a Dupe? Guest post from Julie of Wishes of a Blue-Eyed Girl!
Hello hello, Lit from Within readers!! The lovely Nidia and I have decided to swap blogs for the night. My name is Julie, but I'm also known as the Blue-Eyed Girl, from Wishes of a Blue-Eyed Girl! When Nidia and I were discussing the swap, I just knew what I wanted to do - I wanted to post my normal Comparison Thursday series on her blog for the week! She, in turn, injected some much needed nail art on my blog. Go check out her delicate and pretty design here.
Ok, so on to the subject at hand! Comparisons! I abhor purchasing duplicates. It drives me crazy! Typically, if I find a duplicate or a near duplicate, I have to purge the one with the worst attributes, i.e. takes too long to dry, not pigmented enough, formula is a pain in the tukus to work with, etc. I'm also trying to cut down on my hoardish tendencies, so I've also been purging near duplicates. Lastly, I like doing these comparisons to help people find near duplicates of hard to find polishes to help sate their lemmings. Often times, though, something I think may work well in my head for a comparison doesn't really pan out after all. Tonight, I'm going to show you what I thought may be close dupes where one is hard to find and the other is not, Rescue Beauty Lounge Scrangie and Elevation Polish Pic de Subenuix. Unfortunately, these two aren't even really near duplicates. The color scheme is in the same family, but, as you will soon see, one is much darker than the other.
The basic color scheme for these polishes is a purple base with teal shimmer.
Elevation Pic de Subenuix
Pic de Subenuix is more of a blurple than a true purple. The teal flash is uber present here giving the polish a vivid teal glow.
Application was fantastic, like with most Elevations. I didn't have to add any thinner, and it didn't pool or drag. It's not a one coater like Pic de Sotllo, but took around 3 coats for full opacity. The first coat is a little streaky, but it builds nicely with a few coats. The dry time was great and didn't require too much time to be dry enough that I could go to sleep.
Scrangie
Scrangie's purple base leans red versus Pic de Subenuix's blurple base. The teal shimmer is much more pronounced in the bottle than it is on the nail, which was disappointing.
Also disappointing was the formula. I mean, seriously? You pay that much for a polish with a barely workable formula?
Scrangie is one of those polishes that is so thick that it wants to stick to itself and not spread out on the nail. Then, it was clumpy when you went to add another layer. I was just really disappointed all around. In my opinion, it's just not worth the astronomical prices people are asking in blog sales or other sales forums. If RBL re-releases it, sure, grab one. However, don't pay a bunch of money for it. It's not really worth it.
Pantone Parachute Purple
In the true spirit of teamwork, Nidia has take photos of an alleged Scrangie dupe, Pantone Parachute Purple. Keep in mind that our lighting set ups are different and we don't have the polishes side by side, but it appears that Parachute Purple is closer to being a dupe of Scrangie than Pic de Subenuix.
It does, however, lean more blue than red, so they don't appear to be exact duplicates. If I get my hands on one after my no-buy, I'll definitely update this comparison post.
And here are the obligatory refrigerator photos. I find that I can coax even the most shy duochromes by photographing in the refrigerator.
So, there you have it! Of the two I own, I vastly prefer Pic de Subenuix. However, if you're a collector, I could see the allure of Scrangie.
You can purchase Rescue Beauty Lounge polishes at their online store. Follow Ji's blog and Facebook for updates and news. Elevation Polishes may be purchased at Lulu's Bigcartel store and Llarowe. You can follow Lulu at her blog, I Dig Brown Nail Polish, for news and updates. Lastly, you can purchase Pantone polishes at Sephora.
Thanks so much for reading! Come check out Nidia's post on my blog today, too! It's gorgeous, so well worth the extra click.
Which of the three is your favorite?
Thanks so much, Julie! I loved the comparisons. One of these days I'll get up the courage to start getting rid of my dupes!
*I was not financially compensated for this
post. All items in this review were
purchased by me for my own use. The
opinions are completely my own based on my experience. For more information, please see my
Disclosure Policy in the tab above.*
Ok, so on to the subject at hand! Comparisons! I abhor purchasing duplicates. It drives me crazy! Typically, if I find a duplicate or a near duplicate, I have to purge the one with the worst attributes, i.e. takes too long to dry, not pigmented enough, formula is a pain in the tukus to work with, etc. I'm also trying to cut down on my hoardish tendencies, so I've also been purging near duplicates. Lastly, I like doing these comparisons to help people find near duplicates of hard to find polishes to help sate their lemmings. Often times, though, something I think may work well in my head for a comparison doesn't really pan out after all. Tonight, I'm going to show you what I thought may be close dupes where one is hard to find and the other is not, Rescue Beauty Lounge Scrangie and Elevation Polish Pic de Subenuix. Unfortunately, these two aren't even really near duplicates. The color scheme is in the same family, but, as you will soon see, one is much darker than the other.
The basic color scheme for these polishes is a purple base with teal shimmer.
Elevation Pic de Subenuix
Pic de Subenuix is more of a blurple than a true purple. The teal flash is uber present here giving the polish a vivid teal glow.
Scrangie
Scrangie's purple base leans red versus Pic de Subenuix's blurple base. The teal shimmer is much more pronounced in the bottle than it is on the nail, which was disappointing.
Also disappointing was the formula. I mean, seriously? You pay that much for a polish with a barely workable formula?
Pantone Parachute Purple
In the true spirit of teamwork, Nidia has take photos of an alleged Scrangie dupe, Pantone Parachute Purple. Keep in mind that our lighting set ups are different and we don't have the polishes side by side, but it appears that Parachute Purple is closer to being a dupe of Scrangie than Pic de Subenuix.
It does, however, lean more blue than red, so they don't appear to be exact duplicates. If I get my hands on one after my no-buy, I'll definitely update this comparison post.
And here are the obligatory refrigerator photos. I find that I can coax even the most shy duochromes by photographing in the refrigerator.
So, there you have it! Of the two I own, I vastly prefer Pic de Subenuix. However, if you're a collector, I could see the allure of Scrangie.
You can purchase Rescue Beauty Lounge polishes at their online store. Follow Ji's blog and Facebook for updates and news. Elevation Polishes may be purchased at Lulu's Bigcartel store and Llarowe. You can follow Lulu at her blog, I Dig Brown Nail Polish, for news and updates. Lastly, you can purchase Pantone polishes at Sephora.
Thanks so much for reading! Come check out Nidia's post on my blog today, too! It's gorgeous, so well worth the extra click.
Which of the three is your favorite?
Thanks so much, Julie! I loved the comparisons. One of these days I'll get up the courage to start getting rid of my dupes!
*I was not financially compensated for this
post. All items in this review were
purchased by me for my own use. The
opinions are completely my own based on my experience. For more information, please see my
Disclosure Policy in the tab above.*
Friday, April 19, 2013
Guest post from Brijit of Brijit's Digits!
Today we have a special guest, so everybody say hi to Brijit!
"hi, Brijit!"
I knew you could do it. Hopefully after this post you'll still want to look at my stubby nubs, because her hands are gorgeous. And, she's French, so you might want to read this post with an *outrageous French accent* ala Monty Python.
****
Hello everybody!
Nidia was kind enough to provide a guest post for my blog, Brijit's Digits, and I was thrilled that she offered to host a guest post from me in return! Isn't it lovely, how nail bloggers stick together?
Now, I think Nidia rather spoils you all with her freehand nail art. I'm afraid I'm not as good as she is at that, so I have a bamboo mani for you !
I started with Stranger Tides by O.P.I., a pale khaki, and did a quick sponge gradient with Thanks a Windmillion. Truth be told; I bought and swatched these polishes a long time ago back in the day when I found the time to add to my swatches the polish reference number, and am ashamed to say I haven't worn them since. But they are good quality, as you expect from a brand that's so well known, and great for gradients. For sponging, you don't want a polish that's 100% opaque (it will look grainy), but if it's too thin you have to do sooo many layers, so I always aim to use two-coaters.
If you're pale skinned like I am (after the longest winter ever!), I recommend taking doing your gradients with the lighter colour towards the base of your nail, it is very flattering and will make your fingers look longer! I would imagine that if you have darker skin, the other way round is best. But you don't want to gradient a colour too close to your skin colour, that looks especially odd (I have tested it, trust me!).
Then a quick Konad stamp in white, and hey presto !
What do you think? Nidia tells me you like stamping nail art, does this do it for you or is it tooboring simple? :)
***
Let's give Brijit a hand! I'm totally in love with this look. And, please, don't forget to check out her blog, Brijit's Digits for more gorgeous manis.
"hi, Brijit!"
I knew you could do it. Hopefully after this post you'll still want to look at my stubby nubs, because her hands are gorgeous. And, she's French, so you might want to read this post with an *outrageous French accent* ala Monty Python.
****
Hello everybody!
Nidia was kind enough to provide a guest post for my blog, Brijit's Digits, and I was thrilled that she offered to host a guest post from me in return! Isn't it lovely, how nail bloggers stick together?
Now, I think Nidia rather spoils you all with her freehand nail art. I'm afraid I'm not as good as she is at that, so I have a bamboo mani for you !
I started with Stranger Tides by O.P.I., a pale khaki, and did a quick sponge gradient with Thanks a Windmillion. Truth be told; I bought and swatched these polishes a long time ago back in the day when I found the time to add to my swatches the polish reference number, and am ashamed to say I haven't worn them since. But they are good quality, as you expect from a brand that's so well known, and great for gradients. For sponging, you don't want a polish that's 100% opaque (it will look grainy), but if it's too thin you have to do sooo many layers, so I always aim to use two-coaters.
If you're pale skinned like I am (after the longest winter ever!), I recommend taking doing your gradients with the lighter colour towards the base of your nail, it is very flattering and will make your fingers look longer! I would imagine that if you have darker skin, the other way round is best. But you don't want to gradient a colour too close to your skin colour, that looks especially odd (I have tested it, trust me!).
Then a quick Konad stamp in white, and hey presto !
What do you think? Nidia tells me you like stamping nail art, does this do it for you or is it too
***
Let's give Brijit a hand! I'm totally in love with this look. And, please, don't forget to check out her blog, Brijit's Digits for more gorgeous manis.
Wednesday, April 17, 2013
Guest Post on Brijit's Digits!
This is just the beginning of this look... if you'd like to see the rest (and I know you do!) please check out my guest post today on Brijit's Digits. And, while you're there, you should look at her blog, because her hands are pretty amazing.
Monday, February 4, 2013
Neon Zebra nails with Toni
I got to try something new and challenging today, and I loved how it turned out. My friend, Toni, who is 11, showed me a pix of a mani she liked, but thought that her nails were too small to have it on her nails.
Challenge Accepted.
I used Milani White On the Spot as a base color for the neons. The pink is Essie Flirty Fuchsia, the blue is SOPI Slushied, and the yellow is a neon from a set I got at TJ Maxx or Marshalls.. I can't remember, and I gifted the set to Toni when I was done.
The black was my trusty nail art striper. Took some practice for me to be happy with the stripes. Luckily, Toni is easy-going!
This isn't a look I'd ordinarily think to do for myself, but I loved it on Toni, and it was fun to create. What do you think?
Challenge Accepted.
I used Milani White On the Spot as a base color for the neons. The pink is Essie Flirty Fuchsia, the blue is SOPI Slushied, and the yellow is a neon from a set I got at TJ Maxx or Marshalls.. I can't remember, and I gifted the set to Toni when I was done.
The black was my trusty nail art striper. Took some practice for me to be happy with the stripes. Luckily, Toni is easy-going!
This isn't a look I'd ordinarily think to do for myself, but I loved it on Toni, and it was fun to create. What do you think?
Monday, January 14, 2013
Guest Post at I Heart Pretty Polish!
Pupa holographic polishes! Want to see what I thought and where I went with this look? Please go check out the guest post I did for Essie Rae at I Heart Pretty Polish!
Saturday, November 17, 2012
Guest Post on Ruby's Nails!
I have a guest post on Ruby's Nails today... please head on over there to see what I did with a gorgeous Enchanted Polish duochrome/scattered holo for her.
Saturday, September 29, 2012
Guest Post at Let Them Have Polish!
I'm guesting at Let Them Have Polish! today while Cristina gets a little R&R and feeling better. I hope you'll check out the special mani I did for her, and check out all her swatches and nail art - she's got a fantastic blog.
This is the color I started out with, but you probably wouldn't recognize it in the final product... See what the final look is over at Let Them Have Polish!
Subscribe to:
Posts (Atom)