Friday, September 6, 2013
Tape Challenge #2 - Quilted Zoya
Fireflies, I am beyond excited about today's mani - I can't wait to show you!
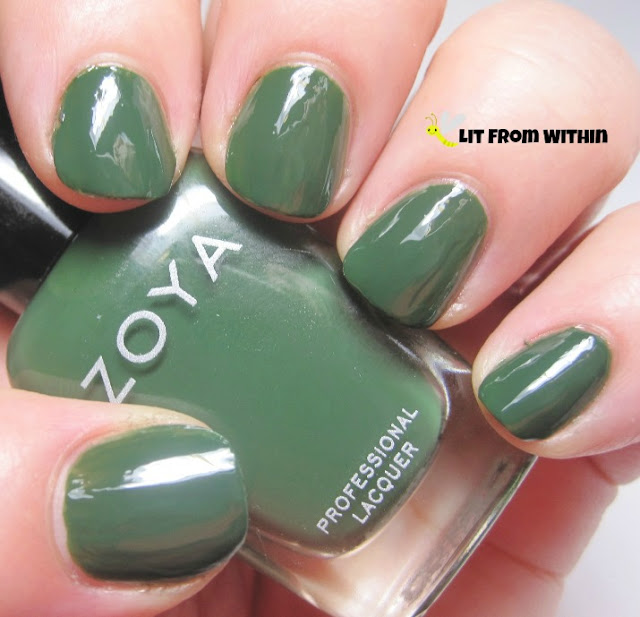
I started with Zoya Hunter, this creamy hunter green. Shiny!
I have been working with striping tape more, and this quilted/Faberge egg mani from The Nailasaurus was so beautiful and complex, I felt the need to tackle it.
I almost stopped at this step - painting over the tape with Zoya Tomoko, and having the quilted look when the tape is removed. But, you may notice that the mani I took the inspiration from has something else...
Studs! I took little microbeads and stuck them individually on little dots of base coat. Because Tomoko is a textured Pixie Dust, I didn't want to have topcoat all over the mani in case that spoiled the effect. So, it was putting a little dot of base coat, then putting one microbead on the end of a dotting tool and placing that on the nail, and repeat. and repeat. And repeat!
I knew the beads would fall off quickly, so I decided to experiment with some topcoat. It really didn't affect the look of Tomoko at all! Can you tell which nail doesn't have topcoat? My husband couldn't, even with his face inches from my fingers. (it's the thumb, btw)
The beads stuck like glue when topcoated... until I peeled all the polish off, because I couldn't take the feel of the studs!
Here's everything I used to make this cool mani: Zoya Hunter, Zoya Tomoko, Sally Hansen base/top coat, striping tape, and a dotting tool and microbeads.
I'm proud of this - it's outside my normal comfort zone for details. I know it's not perfect, but it was way cool. Would you try it?
Subscribe to:
Post Comments (Atom)


I'm totally digging on your tape dispenser. Did you get it that way or use an old one? I really wanna get/make this!
ReplyDeleteI stole the idea from someone else (can't remember who) but I actually just bought a refillable tape dispenser and took the tape out! The only downside is that it doesn't break the tape cleanly all the time - it will stretch the tape, rendering it useless! So you have to be careful breaking the tape. Other than that, I really like it!
DeleteAwesome quilted design! Looks awesome! :)
ReplyDeleteThanks, Lisa! I worked so hard on it! lol
DeleteWow, this is gorgeous!! I'm still a little afraid to try this mani, I'll probably screw it up :p
ReplyDeleteThanks! If I can do it, so can you! And, so what if it's not perfect? Mine isn't, and I still love it. And, if you screw it up, that's what acetone is for. I hope you try it and share your pix! :)
DeleteAhhh-MAZING!!!!!
ReplyDeleteThanks, T! It took awhile, but I love it, too. Wish I were ambidextrous enough to do it on both hands!
DeleteGorgeous mani! I need to do a quilted look..probably with studs, after seeing yours :)
ReplyDeleteThat's the sweetest compliment!! Thank you. I hope you share the pix (or blog link) on my FB page when you do it! I'd love to see your version.
DeleteVery pretty!
ReplyDeleteThank you so very much!
DeleteAbsolutely lovely Nidia! Your hard work paid off!
ReplyDeleteThank you so much, Joy! So nice to get validation from your peers!
DeleteLinda, the Stamping Queen! Thanks, girl!
ReplyDelete